Quick Start Guide
In order to calculate group size, TargetView needs to know these 4 things, at a minimum:- Your target image.
- The range to your target.
- The bullet diameter of your ammo.
- The scale of your target.
Here's are the required steps for creating and measuring a new target:
- Step 1: Set a target image
- Step 2: Enter the range/distance to your target
- Step 3: Set the ammo
- Step 3b: Set the firearm (optional)
- Step 4: Scale your target
- Step 5: Place your shots
- Step 6: Measure your group. Done!
Step 1: Set a Target Image
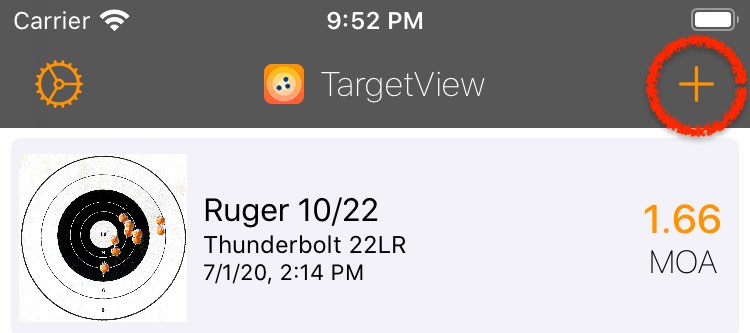
First, create a new target. From the home screen, tap the "+" button at the top right of the screen.
The Target Details page will open automatically.
 Add Target/Outing
You will see that no target is currently set.
Tap where you see Choose Image. You will now have the option to choose from where you would like to import an image.
If you haven't yet taken a picture of your target, you can choose the Camera option and the camera will open. Take a picture of your target, making sure all the shots are in frame.
If you already took a picture of your target, you can choose the Photo Library option to retrieve the image from your iPhone or iPad's photo gallery. If you delete the photo from your gallery, it will still be available inside TargetView.
 Choose Target Image
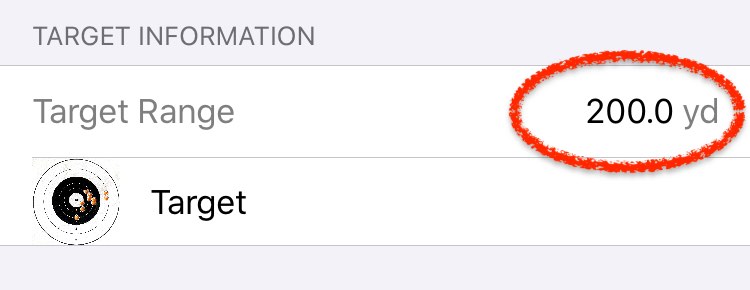
Step 2: Enter the range/distance to your target
Tap the Target Range cell and type in the range to your target.
 Enter Range/Distance to Target
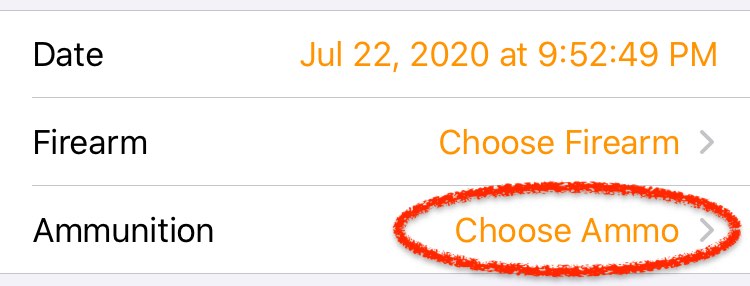
Step 3: Set the ammo
Tap on Choose Ammo to select an ammunition entry from the list.
If you haven't yet added your ammo to TargetView, you can easily do so right now! Tap the "+" icon to add a new ammo entry.
 Choose Ammo
Tap the Save button to save all the details of this particular target/outing and dismiss the target details screen.
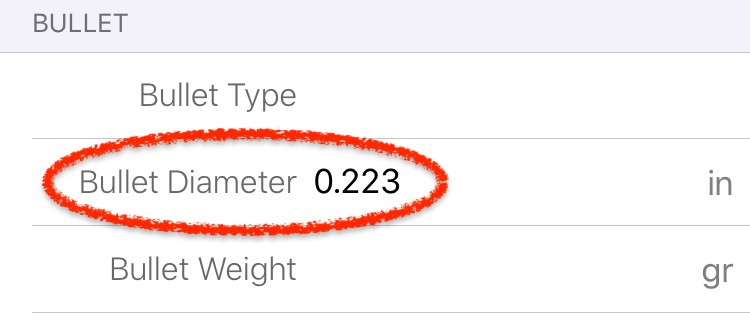 Verify Bullet Diameter
Step 3b (optional): Set the firearm
Tap on Choose Firearm to select a firearm entry from the list.
If you haven't yet added your firearm to TargetView, you can easily do so right now. Tap the "+" icon to add a new firearm entry.
Tap the Save button to save all the details of this particular target/outing and dismiss the target details screen.
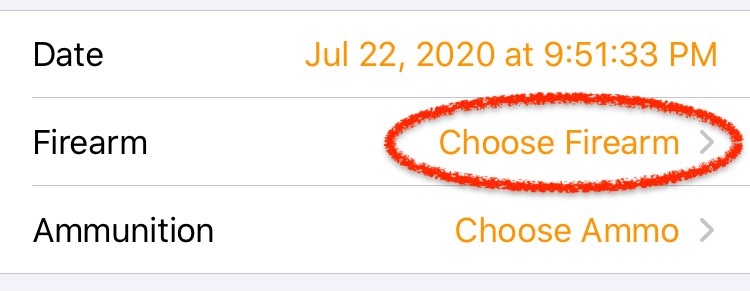 Choose Firearm
Step 4: Scale your target
You should now see your target image and you are now ready to scale the target.
Tap the ![]() button on the bottom toolbar. This displays the scalebar. You should see the scale bar in the center of the target. Depending on the size/resolution of your target image, the scale bar may be very small so pinch-to-zoom-in until you can see the scalebar clearly.
button on the bottom toolbar. This displays the scalebar. You should see the scale bar in the center of the target. Depending on the size/resolution of your target image, the scale bar may be very small so pinch-to-zoom-in until you can see the scalebar clearly.
Tap on the scale bar to turn on scaling mode. The scalebar will turn red. In this mode, dragging anywhere on screen will move the scale bar and pinch-to-zoom will scale the target.
 Scaling Mode On
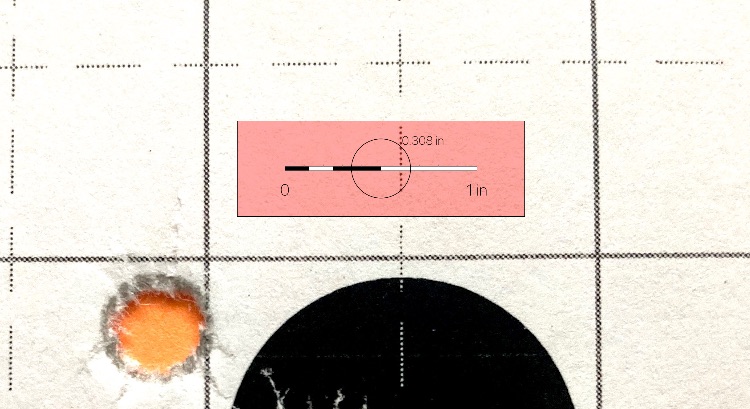
If you have a mark or line on your target that is exactly equal to your reference length (ex: 1-inch) then move the scalebar over your mark and pinch-to-zoom until the scalebar exactly matches your reference length. You can rotate the scalebar while zooming by rotating your fingers.
 Scale Correctly Set to Reference Length
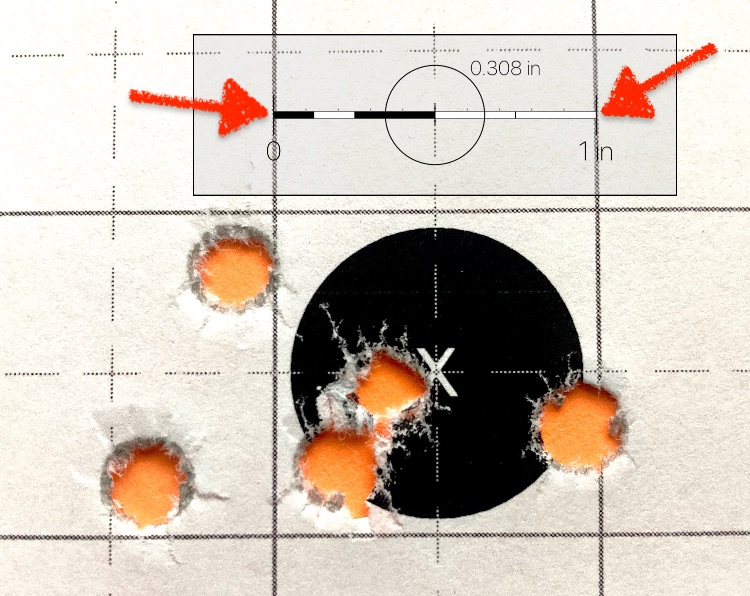
If you do not have any kind of reference length, you can use the scalebar's bullet diameter circle to match up the bullet holes in your target. Make sure that the circle is overlayed at the very outside of the grease ring on your bullet holes.
You can tap the ![]() button to hide the scalebar when you have finished scaling your target.
button to hide the scalebar when you have finished scaling your target.
 Scale Correctly Set to Hole Diameter
Step 5: Place your shots
Tap the ![]() button on the bottom toolbar (next to the ruler button) to enable "shot mode."
button on the bottom toolbar (next to the ruler button) to enable "shot mode."
Tap anwhere on your target to place a shot.
Adjust the position of the shot by dragging it around until it lines up perfectly with a bullet hole on your target.
If you scaled your target correctly, the shot should be exactly the same size as the hole in your paper.
If you need to delete a shot for some reason, tap and hold on the shot. You will be prompted to delete that shot.
Continue place shots until you have a shot over every bullet hole in your shot group.
Turn off "shot mode" when you are done placing shots by tapping the ![]() button again. This way, you won't accidentally add any more shots to your target.
button again. This way, you won't accidentally add any more shots to your target.
 Drag Anywhere to Move Active Shot
Note that shot #2 is the "active" shot. Dragging anywhere on screen will move this shot.
Drag Anywhere to Move Active Shot
Note that shot #2 is the "active" shot. Dragging anywhere on screen will move this shot.
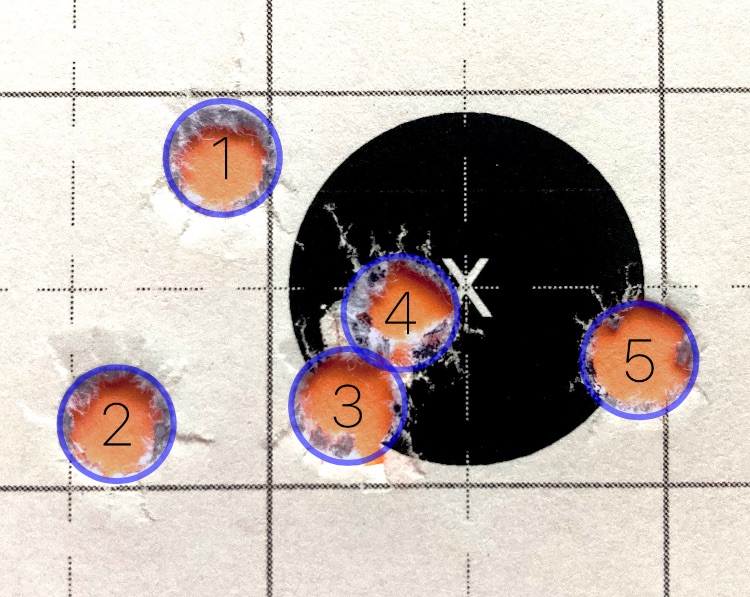 All Shots Marked on Target
Step 6: Measure your group. Done!
Tap the ![]() button on the bottom toolbar to turn on the group-size overlay.
button on the bottom toolbar to turn on the group-size overlay.
You will see an orange circle which encloses all of your shots. This is the calculated size of your group.
The green rectangle also encloses all of your shots. This is the calculated width and height of your group.
The group size, width, and height all appear numerically at the bottom of the screen.
Tap the share button on the bottom toolbar to share your target. You can save a copy of your target to your photos or files; you can text, email, or airdrop your target; you can post your target to twitter or facebook and brag to all your friends!
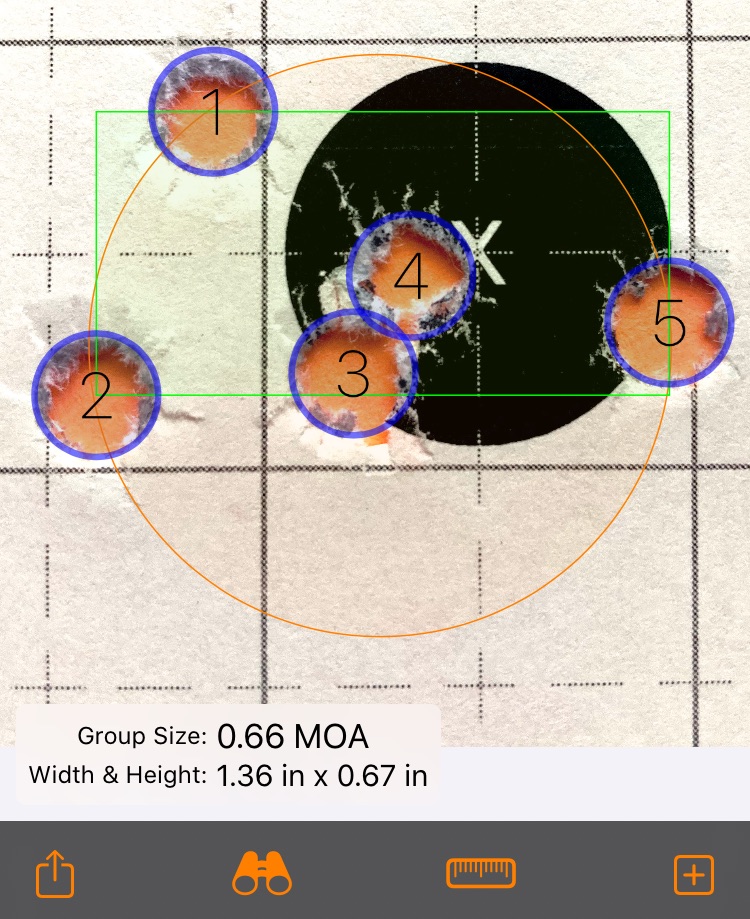 Calculated Group